정확한 이해없이 진행하지 마세요.글작성 중입니다. (시스템 사양 : iMac 12,2 / Mid 2011 )시스템정보확인
정확한 이해없이 진행하지 마세요.
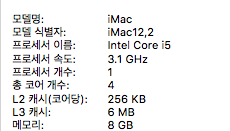
글작성 중입니다. (시스템 사양 : iMac 12,2 / Mid 2011 )
시스템정보확인
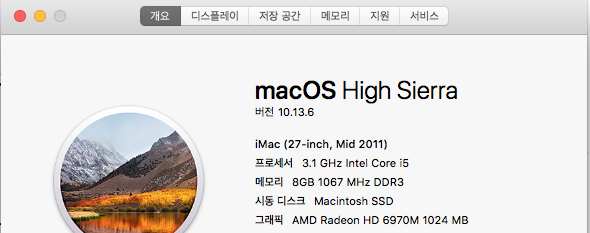
시스템정보 확인
시스템정보 확인
Chaper 1: 사전준비물.준비물 1.윈도우10 다운로드(사파리에서 접근시 윈도우익스플로어 에서와 다른화면이 나옴)링크 :
Chaper 1: 사전준비물.
준비물
1.윈도우10 다운로드(사파리에서 접근시 윈도우익스플로어 에서와 다른화면이 나옴)
링크 :
www.microsoft.com
2.UEFI 부팅 USB 만들기 링크 :
2.UEFI 부팅 USB 만들기

안녕하세요! 이지컴입니다. 이번 포스팅에서는 윈도우10 백프로 활용하기! #1편: EFI 부팅 디스크 만드...
blog.naver.com
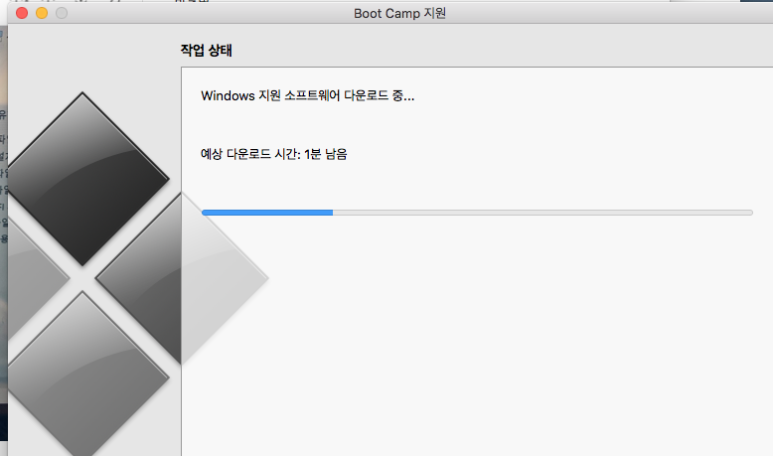
3. 부트캠프 실행 : 지원소프트웨어 다운로드
3. 부트캠프 실행 : 지원소프트웨어 다운로드
3.Mac 버전 : USB 부팅 ISO 만들기링크:
3.Mac 버전 : USB 부팅 ISO 만들기
링크:
Donate via Paypal Donate via Bitcoin Donate via Venmo UNetbootin allows you to create bootable Live USB drives for Ubuntu and other Linux distributions without burning a CD. You can either let UNetbootin download one of the many distributions supported out-of-the-box for you, or supply your own Linu...
unetbootin.github.io
Chaper 2 : 파티션생성1.루트사용자 활성화 (직접 수정하는 방법)
Chaper 2 : 파티션생성
1.루트사용자 활성화 (직접 수정하는 방법)
Mac 관리자는 루트 사용자 계정을 사용하여 더 많은 시스템 영역에 접근이 필요한 작업을 수행할 수 있습니다.
support.apple.com
2.맥 디스크유틸리티-파티션분할 3. gdisk 활용- Hybrid MBR 수정하여 파티션을 수정하여 설치하는 방법 참고링크: 난이도 : 최상급
2.맥 디스크유틸리티
-파티션분할
3. gdisk 활용
- Hybrid MBR 수정하여 파티션을 수정하여 설치하는 방법
참고링크:
난이도 : 최상급
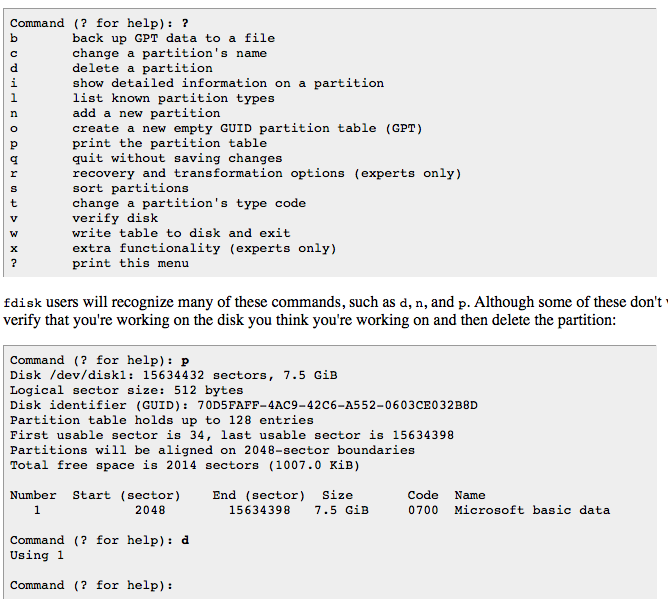
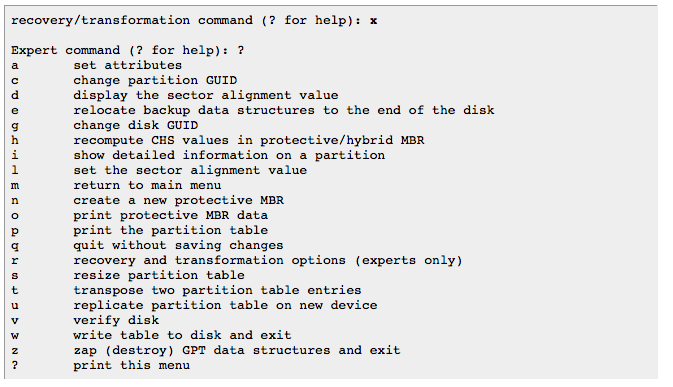
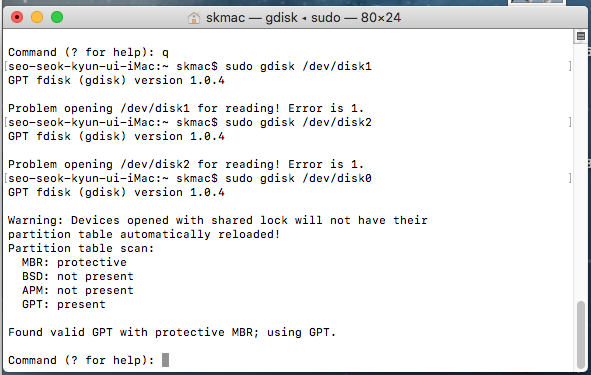
GPT fdisk (consisting of the gdisk , cgdisk , sgdisk , and fixparts programs) is a set of text-mode
partitioning tools for Linux, FreeBSD, Mac OS X, and Windows. The gdisk , cgdisk , and sgdisk programs work on
Globally Unique Identifier (GUID) Partition Table (GPT) disks, rather than
on the older (...
www.rodsbooks.com
Chaper 2 : 부트캠프코딩 수정 : 설치디스크 생성작업 1. 착안사항 : 부트캠프 복사본 패키지를 코딩수정 실행하기 (원본은 시스템무결성 보호로 수정하려면 단계가 위에 설명과 같이 추가됨)2. Xcode 활용 , 복사본 Boot Camp , 코딩 info.list 수정하기..( iMac 12,2 / Boot Camp 6.1.0 ) 시스템사양정보 확인 필수.위치: 패키지내용 -> Cotents
Chaper 2 : 부트캠프코딩 수정 : 설치디스크 생성작업
1. 착안사항 : 부트캠프 복사본 패키지를 코딩수정 실행하기
(원본은 시스템무결성 보호로 수정하려면 단계가 위에 설명과 같이 추가됨)
2. Xcode 활용 , 복사본 Boot Camp , 코딩 info.list 수정하기..
( iMac 12,2 / Boot Camp 6.1.0 ) 시스템사양정보 확인 필수.
위치: 패키지내용 -> Cotents
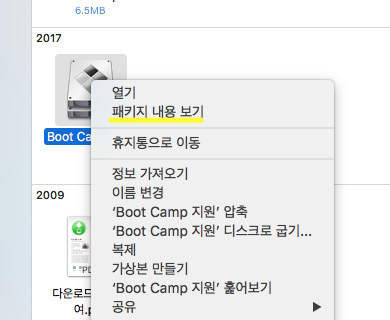
Xcode 설치후 데이타를 수정...다음은 Xcode 에서 보여지는 화면수정본 info.plist
Xcode 설치후 데이타를 수정...다음은 Xcode 에서 보여지는 화면
수정본 info.plist
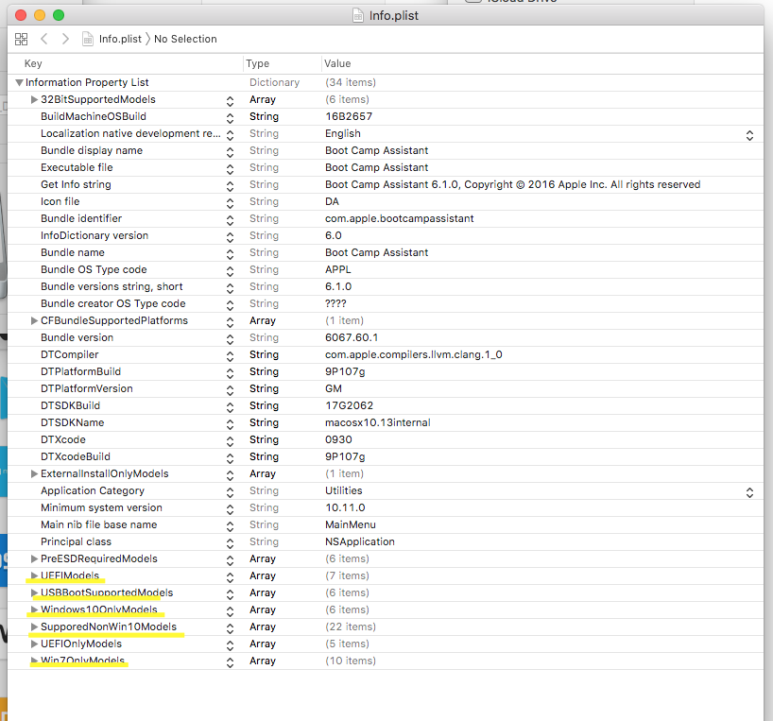
원본 Boot Camp / info.plist
원본 Boot Camp / info.plist
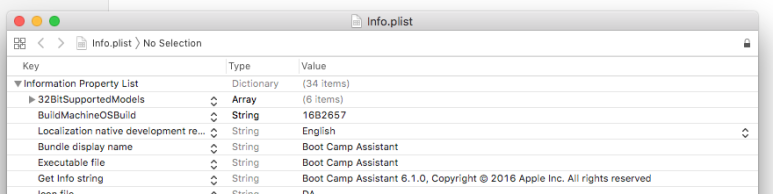
원본은 우측 상단에 보면 잠겨져 있음, 수정불가능.
원본은 우측 상단에 보면 잠겨져 있음, 수정불가능.
마킹부분을 아래와 같이 수정. (위 마킹 사진참고)
1.Then find PreUEFIModels and Delete the word "Pre" then add your Model Identifier number with the surrounding symbols
2.Find PreUSBBootSupportedModels and Delete the word "Pre" then add your Model Identifier Once thats done
원본출처 설명 : 3.find Windows10OnlyModels and add your model number to it. 로 되어있으나,
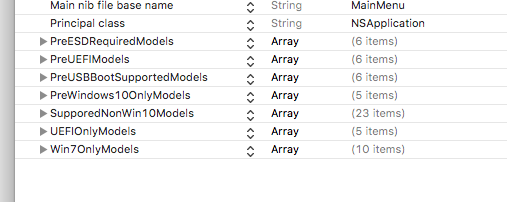
-> 대상화일은 PreWindows10OnlyModels 이 있어서 여기에 iMac12,2 항목추가
대상화일에서 Pre삭제시 : Windows10 아래와같이 설치메뉴가 보인다.
4. 추가수정
Win7OnlyModels 항목에서 iMac12,2 삭제.
5.수정 부트캠프 실행
"복사본 Boot Camp 실행 : 안보이던 Windows10 메뉴가보인다"
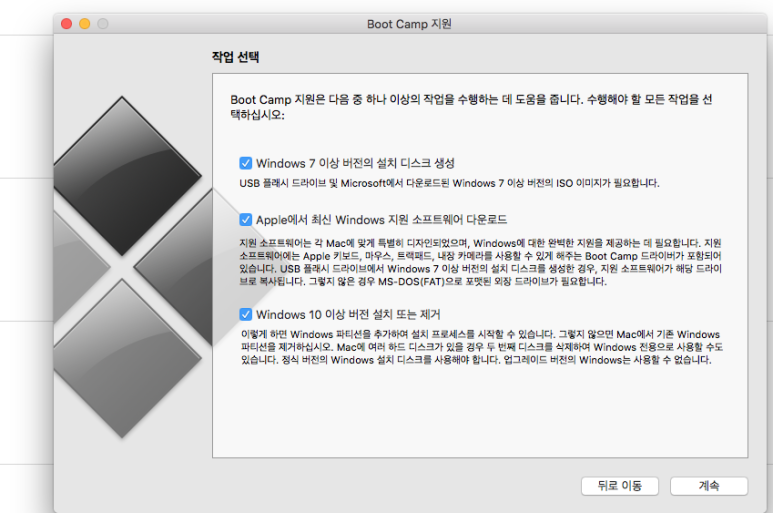
5. Windows10 이상 버전 설치 및 제거 선택후 설치디스크 생성 성공
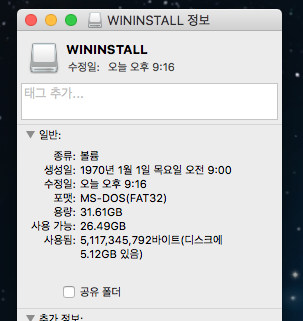
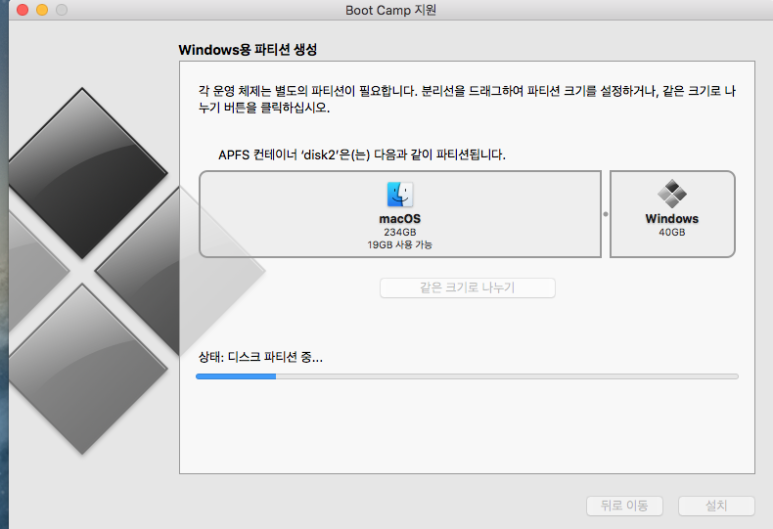
설치디스크가 있어요 파티션이 진행됨.6. 부트캠프로 파티션생성후:Windows(BOOTCAMP) 파티션 포맷Boot Camp 지원이 작업을 마치면 Mac이 Windows 설치 프로그램으로 재시동됩니다. 설치 프로그램에 Windows 설치 위치를 지정하라는 메시지가 표시되면 BOOTCAMP 파티션을 선택하고 '포맷'을 클릭합니다. 대부분의 경우 설치 프로그램이 자동으로 BOOTCAMP 파티션을 선택하고 포맷합니다.
설치디스크가 있어요 파티션이 진행됨.
6. 부트캠프로 파티션생성후:Windows(BOOTCAMP) 파티션 포맷
Boot Camp 지원이 작업을 마치면 Mac이 Windows 설치 프로그램으로 재시동됩니다. 설치 프로그램에 Windows 설치 위치를 지정하라는 메시지가 표시되면 BOOTCAMP 파티션을 선택하고 '포맷'을 클릭합니다. 대부분의 경우 설치 프로그램이 자동으로 BOOTCAMP 파티션을 선택하고 포맷합니다.
7. MBT2GPT
최신 Windows PC에서는 부팅 모드(Boot Mode)로 UEFI를 지원하고 있습니다. 또한 2TB 이상의 하드 디스크라면 GPT(GUID Partition Table) 형식으로 효율적인 Windows 환경을 구축할 수 있습니다. 그러나 최신 PC에서도 BIOS(레거시 BIOS)를 사용 할 수 있습니다. 종래에는 이를 UEFI로 변환하려면 하드 디스크(HDD)를 다시 분할하여 펌웨어를 다시 구성해야 했습니다.
www.tabmode.com
*************************************************************************참고문헌 출처 링크:
*************************************************************************
참고문헌 출처 링크:
Step 2: Modify Bootcamp
While the software is downloading, we can modify Bootcamp to allow our computer to create an install disk on our 8gb flash drive. Copy the app onto the desktop and then open the Info.plist in TextEdit. From there:
BOOTCAMP VERSION 6.0.0
Add your Boot ROM Version to DARequiredROMVersion Then find PreUEFIModels and Delete the word "Pre" then add your Model Identifier number with the surrounding symbols Find PreUSBBootSupportedModels and Delete the word "Pre" then add your Model Identifier Once thats done find Win7OnlyModels and Remove your model number
BOOTCAMP VERSION 6.1.0
Then find PreUEFIModels and Delete the word "Pre" then add your Model Identifier number with the surrounding symbols Find PreUSBBootSupportedModels and Delete the word "Pre" then add your Model Identifier Once thats done find Windows10OnlyModels and add your model number to it.
Now Bootcamp can create a Windows 10 flash drive. Let the download finish before the next step. Then save the document
Step 3: Backup Hard Drive and Create Windows 10 Install Flash Drive
Now we make the bootable usb flash drive for Windows 10. Only select the first option in Bootcamp. We will get to those other two later. Once the install disk is created, put the Bootcamp Support file on your bootable usb flash drive. Next, copy your personal files to the other, larger usb stick. This to make sure that no files are lost during the process, just in case something goes wrong. You may delete those files after the whole process through step 8 are completed.
Step 4: Install Windows 10
Now we can create the partition and install windows 7 onto that. MAKE SURE you have enough space on the Windows side, because you cannot change it afterwards! You should chose to skip the product Key at this point as it is easier to upgrade and verify a product key later inside Windows 10. Write down the product key before you install Windows 10
Step 5: Bootcamp Setup
Download the Apple support file onto the Windows side and run it in compatibly mode. All the drivers should install automatically. Now you can choose the start-up OS. The brightness, volume, and backlight keys should work now.
Step 6: Windows 10 Product Key
Go into start-up and go to settings. Click the ‘Activation’ ribbon to insert your own product key. The non activated Windows 10 is legally free but you will have limited options. To get the full version of windows 10, you will have to use your own product key.
Step 7: Coprocessor Driver
The coprocessor will not have a driver. Therefore, you must install one yourself. Go to the Device Manager and right click the coprocessor with the error sign on it. Select ‘Update Driver’ and aim the troubleshooter at the apple support file. To do that, select the file with your Apple support file.
6.Coprocessor 다운로드 : 그래픽 크래쉬 이슈 해결에 도움을 줌.
Home » Coprocessor Use the links on this page to download the latest version of Coprocessor drivers. All drivers available for download have been scanned by antivirus program. Please choose the relevant version according to your computer's operating system and click the download button. System In...
www.driverscape.com
원문: 네이버 블로그 한강 (hangang_z) · 2020-01-24 최초 게시